
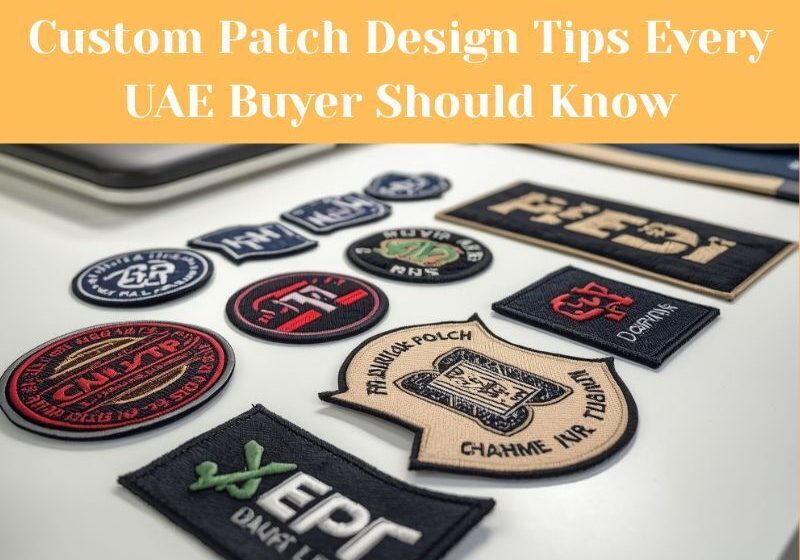
How to Design a Custom Patch: Professional Tips for Better Results
Custom patches can turn a plain jacket, uniform, military cap, or bag into something much more distinctive. They are also useful for businesses, schools, sports teams, clubs, and community groups that want a recognizable visual identity.
But creating a good patch involves more than choosing a logo and sending it to a manufacturer. Size, colours, artwork, borders, fabric, and application method can all affect the final result. Keep reading to learn practical tips to help you create a patch that looks good and works well for its intended purpose!
The Right Way To Create Your Custom Patches
Creating a patch is a fun process once you get to learn the basics. Here are some professional tips to remember as you put in the effort to create your favorite patches.
- Start With a Clear Concept
Decide what the patch needs to communicate before you start working on the artwork. It might feature a company logo, team name, mascot, initials, or a particular symbol.
Keeping the central idea clear makes the design easier to develop. Custom patches UAE with one recognizable subject can have a stronger visual impact than one containing several unrelated elements.
- Choose the Right Size
Think about where the patch will be placed before deciding its dimensions.
A small patch for a cap needs a different approach from a large back patch for a jacket. Measure the available space and consider how the design will look from a normal viewing distance.
Don’t make the patch unnecessarily large simply to fit more information into it.
- Keep the Artwork Simple
Detailed artwork can be difficult to reproduce on a small patch. Thin lines, tiny patterns, and complicated illustrations may lose definition during production.
Simplifying the artwork can actually make the finished design stronger. Keep the features that make the image recognizable and remove details that do not contribute much to the overall appearance.
- Use Colors That Contrast
Good color contrast helps the artwork stand out.
For example, dark lettering against a dark background can become difficult to read, especially in situations when the patch is viewed from a distance. Choose background and thread colors that are visually distinct.
Don’t forget to think about the color of the garment underneath the patch.
- Pick a Suitable Patch Shape
Your patch doesn’t have to be rectangular.
Circles, shields, ovals, squares, and custom-cut shapes can all work well. The shape should complement the artwork rather than forcing the design into an unsuitable space.
A circular badge may suit a club emblem, while a shield shape could work better for a school or sports design.
- Make the Text Easy to Read
Text needs special attention because small lettering can quickly become unclear.
Use clean, legible fonts and avoid squeezing too many words into a limited space. If a name or slogan is important, give it enough room to remain readable.
Short words or initials are usually easier to reproduce successfully if you are creating small patches.
- Don’t Ignore the Border
A border gives the patch a defined edge and separates the artwork from the material underneath. It can be extremely useful when your patch is going onto a patterned or strongly colored garment.
A contrasting border can also make the design appear cleaner.
Always choose a border color that supports the main artwork instead of competing with it.
- Consider Where the Patch Will Be Used
This is very important.
- A patch for workwear may need to withstand frequent washing and regular use.
- A decorative patch for a fashion jacket may have different requirements.
- Similarly, a patch intended for outdoor equipment may need materials and construction suitable for greater exposure to moisture and changing temperatures.
The intended application should influence your design decisions.
- Choose the Right Material
Gulf patches can be made using different materials and techniques.
- Embroidered patches are popular because thread creates a textured, traditional appearance.
- Woven patches can provide a smoother surface and are often useful for designs containing smaller details.
- Leather, PVC, and other materials can create completely different visual effects.
The right option will always depend on the artwork, budget, application, and appearance you want.
- Decide How the Patch Will Be Attached
There are several ways to attach a patch, including sewing, adhesive backing, hook-and-loop fastening, and heat application.
Think about whether the patch should be permanent or removable.
For example:
- A uniform = needs a more secure attachment
- Fashion item= will require something more flexible
Always check that the chosen application method is appropriate for the garment or material.
- Test the Design at Actual Size
A huge mistake is judging a patch only on a large computer screen.
Reduce the artwork to its intended dimensions and inspect it at that size. This can reveal problems with text, spacing, borders, and small details before production begins.
If something is difficult to see on screen at actual size, it may be even less noticeable once reproduced on fabric.
- Use High-Quality Artwork
Low-resolution images can create problems during production.
If possible, provide a high-resolution file or vector artwork.
Clean lines make it easier for a manufacturer to interpret the design accurately.
If your only available file is a small image, ask whether it can be recreated or professionally prepared before production.
- Think About the Fabric
The material underneath the patch matters too.
Cotton, denim, polyester, canvas, and other fabrics have different textures and levels of flexibility. A patch that works perfectly on a structured cap may behave differently on a soft T-shirt.
Consider the weight and stretch of the garment before choosing the patch construction.
- Order a Sample for Large Projects
If you need a large quantity of patches, consider producing a sample first.
A sample gives you an opportunity to check the colors, dimensions, artwork, and overall finish before committing to the full order.
This can be especially useful for businesses, schools, events, and organizations where replacing a large batch would be inconvenient or expensive.
- Work with an Experienced Patch Maker
A good manufacturer can identify practical problems before they reach production.
Experienced patch makers can review the artwork, suggest suitable materials, advise on sizing, and explain which construction method is likely to work best.
The best part? You get to keep control over the look and purpose of the patch. The manufacturer’s role is only to help translate that idea into a product that can be produced effectively.
Common Queries Answered
- How much does it cost to make a custom patch in the UAE?
The final price depends on factors such as patch size, material, number of colors, attachment method, quantity, and the design complexity. Huge orders may have different per-unit pricing from small batches.
- Can a company logo be turned into a patch?
Yes. Logos are commonly turned into patches for uniforms, caps, bags, and promotional merchandise. A very detailed logo may need to be simplified to work effectively at patch size.
- Can custom patches be made in small quantities?
Yes, many manufacturers accept smaller orders, although minimum quantities and pricing are different. Always check the supplier’s requirements before finalizing your design.
Wrapping Up
Making a custom patch in the UAE starts with a strong idea, but the production details matter just as much. A design that looks impressive on a screen needs to be simplified before it can work at a small physical size.
So before anything else, focus on choosing the right dimensions, limiting unnecessary detail, checking color contrast, selecting an appropriate material, and testing the artwork to end up with a design that looks good and performs well!
Total Views: 12